- Home
- Level 1: Kendo Guide for Complete Beginners
- How to Bow in Kendo
How to bow in
standing position and sitting position.
Japanese people bow a lot. When you greet someone, you have to bow to them.
When you say goodbye to people, you say goodbye to them while bowing. You bow when you apologise and you bow when you show appreciation.
In kendo, or in any Japanese martial arts generally, bowing shows respect for your opponent.
Rei ni Hajimari Re ni Owaru - The concept of Japanese martial arts
It means, "Start with bow and end with bow". But the word "Rei" also means "respect". So it really means,
"Start with bow to show your respect to your opponent and end with bow to show your respect to your opponent".
Two Bows
There are two kinds of bows. One is a standing bow or "ritsu rei" and the other one is a sitting bow or "zarei".
Ritsu rei:
There are two standing bows. One is to your opponent and the other one is a fairly formal one. The difference between them is an angle of the bow.
1. To your opponent: Keep your body in shizentai position. Bend your body from the hip while looking at your opponent. The angle of your body is about 15 degrees, since you have to keep your eyes on your opponent.
* Point: Do not keep your face straight towards your opponent. Angle your face slightly down and diagonally towards them while keeping your eyes on them.
2: Formal standing bow: This is used when you bow to teachers, higher ranks and shomen (the front). This time you do not keep your eyes on them. You have to look down. The angle of your body when you bow is 30 degrees.
Zarei:
In seiza, have your hands in front of your knees and then slowly and quietly lower your head. Pause a while. Then slowly lift your head up and back to the right-up position. When you place your hands in front of your knees, make a triangle by the index fingers and thumbs of both hands.
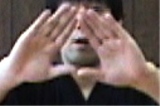
As you lower your head, guide your nose towards the triangle formed by your hands.
When you lower your head, keep your eyes open so that you can still look around while bowing.
* Points: When you lower your head, do not lift your butt up. Don't roll your shoulders too far forwards. Do not stick your elbows out too much.
Keep the back of your neck and your back straight. Place your right big toe on top of your left big toe.
This lesson is part of Level 1: Kendo Guide for Complete Beginners.
Back to Level 1: Complete Beginners
"Kendo Guide for Beginners" and "Kendo Guide for Complete Beginners" are available. "Kendo Guide for Beginners" is designed to help those who already go to a dojo. "Kendo Guide for Complete Beginners" is designed to give you an even better understanding in kendo. The latter has more detailed videos available.